Version 2 – Frontend
After building and learning from the first version of Praport, I knew I needed a better way forward. I needed modern tooling, a more structured frontend, and an easier way to manage UI logic and state. That's when I turned to React, paired with Next.js — a full-stack React framework that made routing, rendering, and deployment significantly easier.
For styling and layout, I used Tailwind CSS. Its utility-first approach allowed me to design quickly without writing custom CSS classes. Tailwind made the frontend cleaner, faster, and far easier to scale.
Landing Page
The updated landing page featured a bold header, responsive layout, and input logic built directly with React. Here’s how it looked in its early form:

With React's state management, the app could respond instantly to user input and feedback. There was no need for page reloads or form posts — everything was dynamic and much smoother.
Dashboard Redesign
The shipment dashboard was also rebuilt. It featured a responsive grid layout for shipment stats, and a dynamic table powered by React. Here's how the updated dashboard looked:
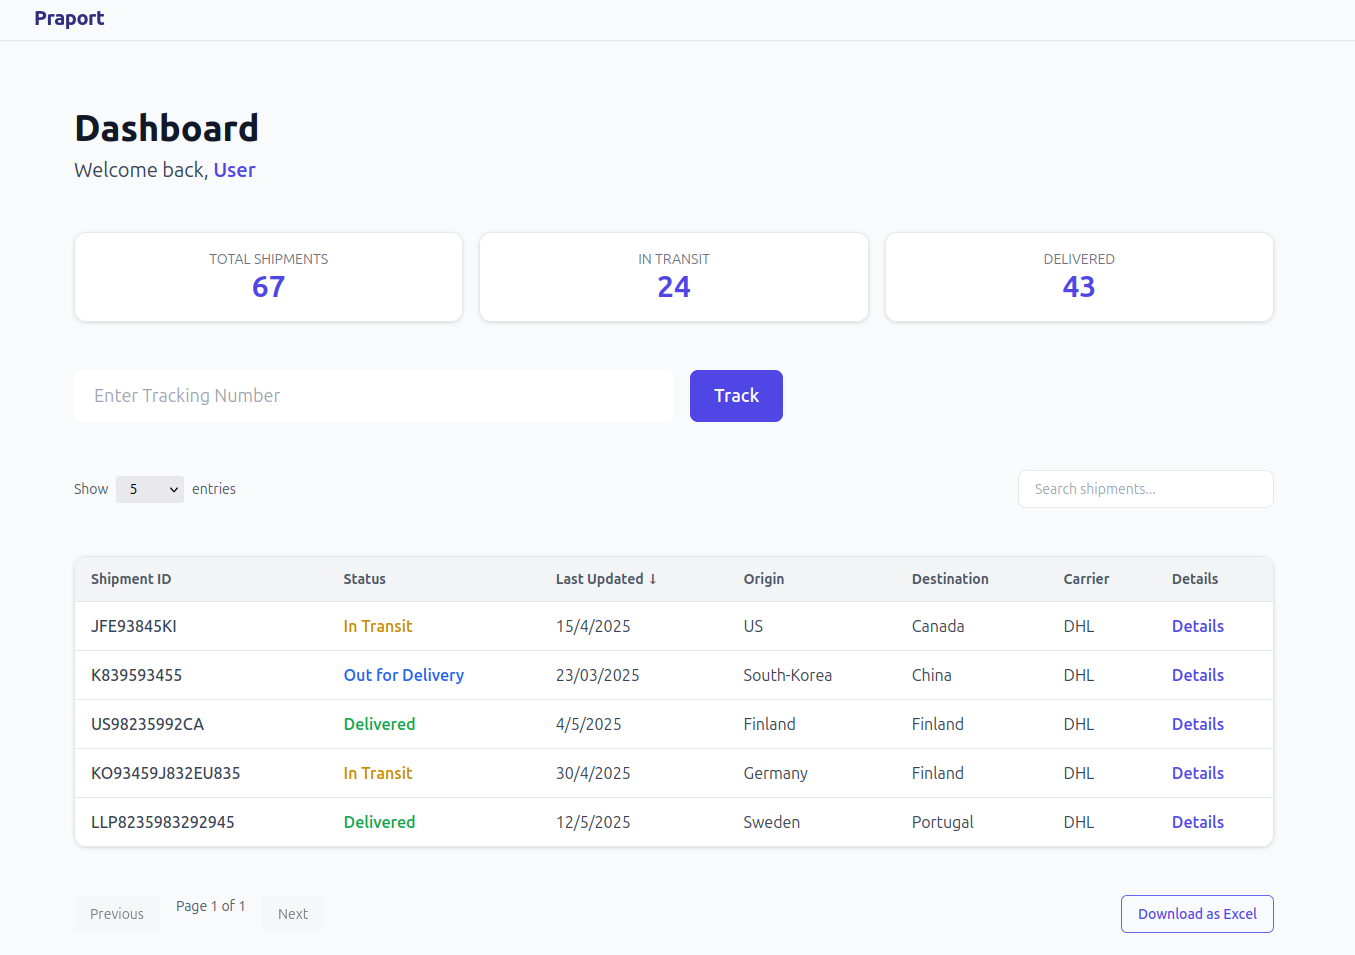
Instead of vanilla JavaScript, the shipment data and counter logic were handled using React hooks like useState and useEffect. Here's an example of how shipment stats were updated when the data changed:
useEffect(() => {
const delivered = shipments.filter(s => s.status === 'Delivered').length;
const inTransit = shipments.length - delivered;
setDeliveredCount(delivered);
setInTransitCount(inTransit);
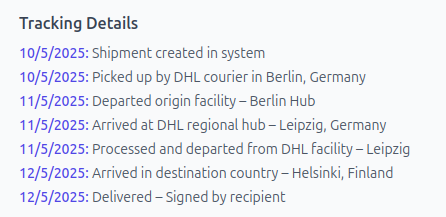
}, [shipments]);Shipment Detail View
One major upgrade was the introduction of a "Details" button for each shipment. Clicking it would expand a timeline showing all shipment events (status, timestamp, and location) — built with collapsible React components.
{showDetails && (
  <div className="mt-4 bg-gray-700 p-3 rounded">
    {shipment.events.map((event, index) => (
      <div key={index} className="mb-2">
        <p className="text-sm font-semibold text-blue-300">{event.timestamp}</p>
        <p className="text-sm text-white">{event.description} ({event.location})</p>
      </div>
    ))}
  </div>
)}
All the frontend logic was neatly organized into reusable components, improving readability and modularity. Compared to version 1, the codebase became easier to maintain and much more scalable.